> ## Documentation Index
> Fetch the complete documentation index at: https://flashrdp.com/docs/llms.txt
> Use this file to discover all available pages before exploring further.
# Password, Login Email and Two-Factor Authentication
> Change your FlashRDP account password and login email, sign out other devices, and turn two-factor authentication on or off in the Billing Portal.
These settings protect your FlashRDP account, the one you use to sign in to the [Billing Portal](https://new.flashrdp.com/settings/security). They don't change the password of your servers; for that, see [Reset server password](/docs/control-panel/reset-server-password).
 ## Change your password
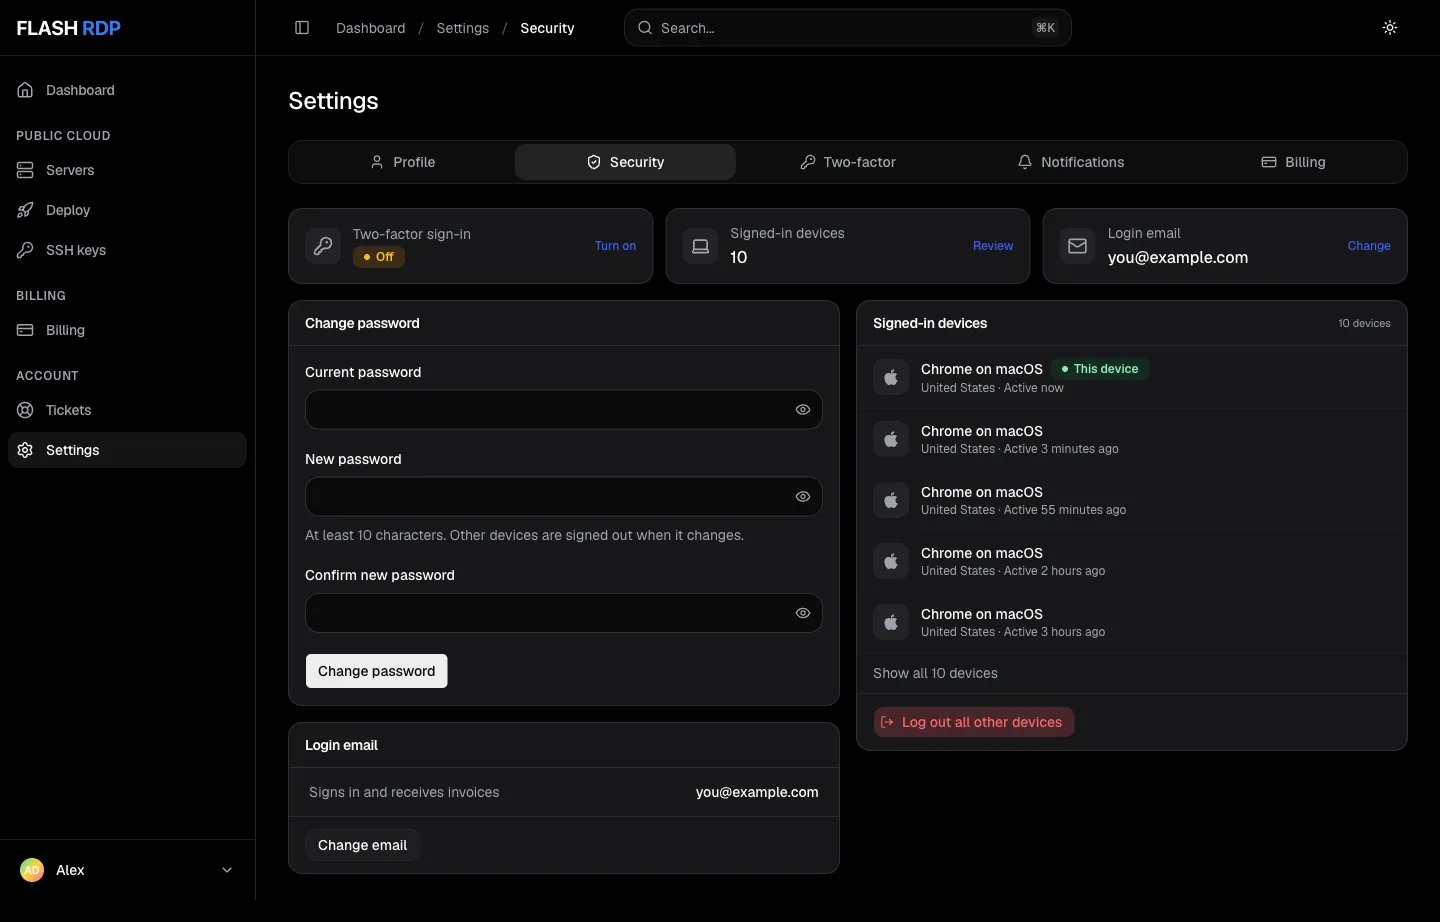
Click **Settings**, then the **Security** tab.
Under **Change password**, enter your **Current password**, a **New password** (at least 10 characters) and **Confirm new password**.
Click **Change password**. Your other devices are signed out; this one stays signed in.
Forgot your password and can't sign in? See [Create an account and sign in](/docs/getting-started/create-account#forgot-your-password).
## Change your login email
Your login email is the address you sign in with. Invoices and account emails go there too.
On **Settings → Security**, under **Login email**, click **Change email**. Enter the **New email** and your **Current password**, click **Continue**, then click **Send link** to confirm.
Open the link we send to the new address within 30 minutes, in a browser where you are signed in to the Billing Portal.
You now sign in with the new address, invoices go there, and every other device is signed out. The old address gets a notice.
## Signed-in devices
**Signed-in devices** lists every browser signed in to your account, with its country and when it was last active.
If you see a device you don't recognise, click **Log out all other devices** and confirm with **Log out others**, then change your password. Your current device stays signed in.
## Two-factor authentication
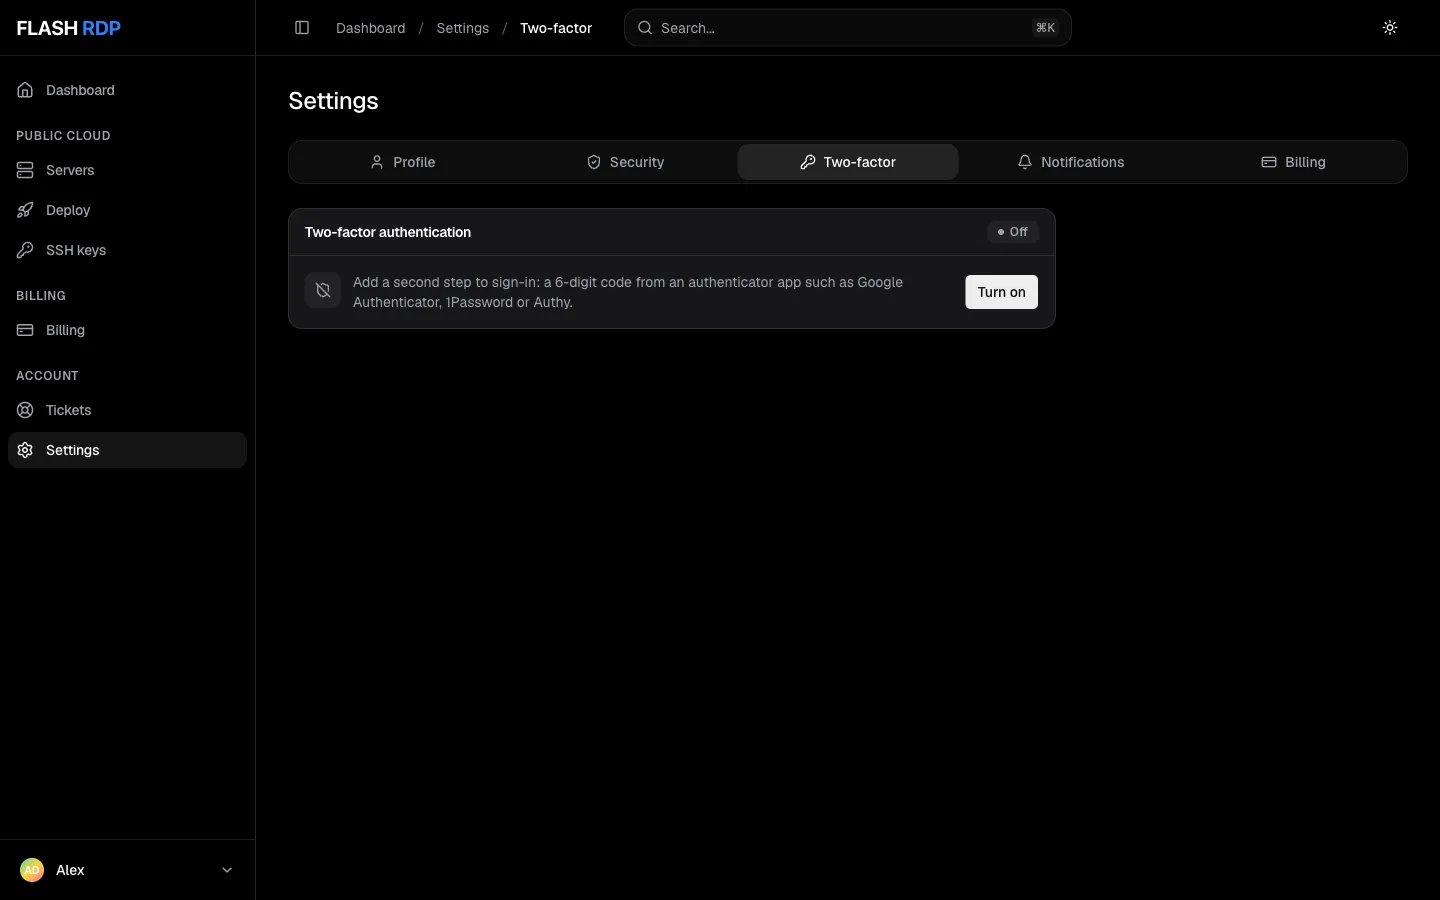
Two-factor authentication (2FA) adds a second step to sign-in: a 6-digit code from an authenticator app such as Google Authenticator, 1Password or Authy.
## Change your password
Click **Settings**, then the **Security** tab.
Under **Change password**, enter your **Current password**, a **New password** (at least 10 characters) and **Confirm new password**.
Click **Change password**. Your other devices are signed out; this one stays signed in.
Forgot your password and can't sign in? See [Create an account and sign in](/docs/getting-started/create-account#forgot-your-password).
## Change your login email
Your login email is the address you sign in with. Invoices and account emails go there too.
On **Settings → Security**, under **Login email**, click **Change email**. Enter the **New email** and your **Current password**, click **Continue**, then click **Send link** to confirm.
Open the link we send to the new address within 30 minutes, in a browser where you are signed in to the Billing Portal.
You now sign in with the new address, invoices go there, and every other device is signed out. The old address gets a notice.
## Signed-in devices
**Signed-in devices** lists every browser signed in to your account, with its country and when it was last active.
If you see a device you don't recognise, click **Log out all other devices** and confirm with **Log out others**, then change your password. Your current device stays signed in.
## Two-factor authentication
Two-factor authentication (2FA) adds a second step to sign-in: a 6-digit code from an authenticator app such as Google Authenticator, 1Password or Authy.
 ### Turn it on
Click **Turn on**.
Scan the QR code with your authenticator app, or enter the key shown below it by hand. Enter the 6-digit code the app shows and click **Turn on**.
Copy the backup code and keep it somewhere safe, away from your phone. Click **I saved it**.
From now on, signing in asks for a code. Your other devices are signed out when you turn 2FA on.
Lost your phone? Sign in with your **backup code** instead of an app code, then set up 2FA again. Without the app and the backup code, you need to contact support to get back in.
### Turn it off
On **Settings → Two-factor**, click **Turn off**. Enter your **Current password** and a **Code from your app, or your backup code**, click **Turn off**, then confirm with **Turn off** again. Other devices are signed out and we email you a notice.
## Related Articles
Sign in, use 2FA and reset a forgotten password.
Profile, notifications and billing details.
This documentation is built and hosted on [Mintlify](https://mintlify.com), a developer documentation platform.
### Turn it on
Click **Turn on**.
Scan the QR code with your authenticator app, or enter the key shown below it by hand. Enter the 6-digit code the app shows and click **Turn on**.
Copy the backup code and keep it somewhere safe, away from your phone. Click **I saved it**.
From now on, signing in asks for a code. Your other devices are signed out when you turn 2FA on.
Lost your phone? Sign in with your **backup code** instead of an app code, then set up 2FA again. Without the app and the backup code, you need to contact support to get back in.
### Turn it off
On **Settings → Two-factor**, click **Turn off**. Enter your **Current password** and a **Code from your app, or your backup code**, click **Turn off**, then confirm with **Turn off** again. Other devices are signed out and we email you a notice.
## Related Articles
Sign in, use 2FA and reset a forgotten password.
Profile, notifications and billing details.
This documentation is built and hosted on [Mintlify](https://mintlify.com), a developer documentation platform.